Hiển thị các bài đăng có nhãn nail art tutorial. Hiển thị tất cả bài đăng

Thứ Hai, 9 tháng 4, 2012

How to Spot Fake Konad Nail Stamping Products


The Konad system of nail art stamping and the many products used in this process are collectively the hottest new thing in contemporary nail art technology. However, before you jump on the Konad bandwagon, there is one thing that you should be aware of. Many companies based in China are currently marketing poorly crafted knock-offs of Konad's line of products which, although visually similar to Konad, produce inferior results. If you want to offer genuine Konad results to your clients, you need to be able to avoid these knock-offs. In this article, I'll show you how to tell the difference between these shoddy fakes and the genuine article.

(By the way – in our store we sell only genuine Konad products. So if you are worried that you might have trouble telling the difference, you can always avoid problems by buying directly from “Viva La Nails”. I've tried both products myself and know from experience that only the real Konad system is worth spending money on.)

Scraper - the first item that you can look at to see if you are getting a genuine Konad product is the scraper. Notice how the Konad scraper on the left has the brand name printed clearly on the front and is of a slightly darker colour than the fake on the right. You can also tell the difference by the spacing of the holes on the scraper edge. The real product has evenly spaced holes while the fake does not.

The genuine Konad scraper features a straight and precise metal blade which leaves no excess nail polish on the plate.

Stamper - the original Konad stamper is somewhat hard to differentiate from the fake. However, if you look closely, you will notice that the Konad stamper has a slightly darker coloured surface. This results from using a higher quality material.

Image Plates - the difference in quality between the stamping plates is the number one problem with using fake Konad products. Fake plates are made using an inferior crafting method, resulting in imperfect designs.

The Konad plate (pictured on the left) was made using a precise advanced laser etching technology. As you can see, the fake image plate was created using an inferior laser technique, resulting in rough edges and inferior performance.

Fake Konad image plates have a dangerous sharp edge around the sides, again resulting from poor manufacturing. The producers of Genuine Konad products smooth the edges to prevent the possibility of injury.
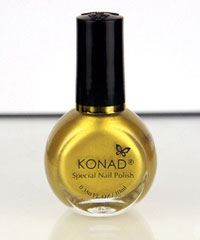
Special Nail Polish - real Konad nail polish has a higher viscosity than regular nail polish or fake Konad nail polish. This results in a smoother application. Fake Konad polish also tends to come in duller, less vibrant colours, making it easy to spot.

Hologram - finally, the easiest way to differentiate real Konad products from the fakes is the Konad hologram, which you can see here. In it you can see a textured array of flowers and the Konad brand name. Fakes will lack this identifying marker.

The Result

The difference between the results that you can achieve with Konad and the results you can expect with a fake is obvious. Notice how the Konad nail art (on the left) is so much sharper and clearer than the fake Konad nail art (shown on the right). If you want your clients to be happy with their nails, by all means, make sure that you only purchase genuine Konad products.

Why and How to Use Paper Nail Forms


Paper nail forms are one of the staples of the nail care industry, you simply can't do without them as a professional nail care technician. These disposable forms are the perfect base upon which to build a sculpted nail.

They are especially helpful when working on toenails which can be rather difficult to work with otherwise. You simply apply the paper nail form and use it as a guide upon which to do your overlay work. After the overlay is finished, you simply remove the paper form and you're done!

However, not all nail types are right for sculpted nails!

Therefore, before beginning to use paper nail forms, you will want to know when it is appropriate to use them and when it is better to use a tip overlay.

It is okay to use a paper nail form with a sculpting technique when:

    If your client has a nail that is chipped or broken then a sculpting technique is appropriate. This problem is easy to fix using sculpting. Also, if your client has nails with a severe hook shape. This can sometimes be addressed using a sculpting technique as well.

Otherwise, you want to use this technique mainly on people with normal nails who are not engages in strenuous activities with their hands.

It is NOT okay to use a paper nail form with a sculpting technique when:

    If you client has abnormally shaped nails, a sculpting technique is usually not the best options. For example, if he or she has flat nails, upward curving nails, or crooked nails, it may be better to use a nail tip technique. Also, if your client has bitten nails or nail plates that in poor condition, the sculpting technique is not a good option.

Here's how to do it!

While some of your clients will not be good candidates for the sculpting technique, chances are that most of them will fit into the first of these two categories, meaning being able to use paper nail forms is an important skill for your cannon.  Here's how to use them:

Step 1 – Remove the centre piece from the nail form.

Step 2 – Now reattach this centre piece to the adhesive inner surface of the nail form. This keeps the form from sticking to the bottom side of the nail.

Step 3 – Bend the form over slightly in order to make it match the nail's curvature.

Step 4 – Now, tear the perforations at the top edge of the form as pictured above.

Step 5 – Next, fit the criss-cross edge of the form under the nail surface. Make sure to use two hands for this if you can.

Step 6 – Make sure that the nail form is snug and centred in place.

Step 7 – Now press together the inside edges of the form until they stick together.

Step 8 – Just to be sure, make a small cut at the corner and bend it back so that you know the form is securely in place.

Step 9 – Make sure once again that the curve of the form is straight and matches the curvature of the nail.

Step 10 – Now secure the entire form in place by folding down the loose edges over the finger.

Step 11 – That's it! You are now ready to begin work on your sculpted overlay.

How To Slice Nail Art Canes


If you haven't yet heard of “Nail Art Canes,” allow me to ask you: “Where have you been hiding?” Nail Art Canes, also known as Fimo Nail Art Canes are one of the most interesting developments to hit the nail art industry in several years. By cutting these coloured nail art canes into slender slices, you can create instant nail art designs that are sure to impress your clients.

Not only are our nail art canes hand crafted from ceramic, but each one is put through a tough quality control process in order to insure that the product that you receive is flawless and ready for use in your nail art practice.

In order to use these nail art canes you will need a speciality knife designed to cut through ceramic. Be careful however when using this knife, as it is very sharp! Nail Art Canes come in segments of about five or six centimetres in length and five millimetres in diameter. If you plan to use Nail Art Canes with artificial nails, you may cut them to a thickness of about 0.2 mm - 0.5 mm each. If you plan to use them with natural nails, we recommend cutting each piece to a thickness of less than 0.2 mm.

If used and stored correctly, each cane should last you for quite some time.

You can however also purchase precut nail art cane slices from us at a reasonable price. This is a viable option, but in my opinion not the best choice. Professional nail art technicians prefer to use whole nail art canes for several reasons:

• With uncut nail art canes, you—as the nail artist—can decide how thick you would like your pieces to be. This makes them applicable for use in just about any nail art technique.

• Ultimately you will save money by purchasing whole canes, since you can get about 100 pieces from each cane.

• By using slices cut by yourself, you will lessen the likelihood of over-filing your designs.

• When you cut your slices yourself, you will be able to use them even with very curvy or unusually shaped nails.

Now, while there is certainly more than one way to cut a nail art cane, I would like to present you with what I feel is the most effective of them all. Don't worry if at first you need to take your time at the cutting process. This is fine. With practice, you will be able to turn yourself into a veritable cutting machine.

By the way, you can save time by doing this process ahead of time, before your shop opens or during slow hours during the day. This way you will always have your nail art slices ready when a client comes in.

Okay now, with no further ado, here is my easy-breezy method for cutting nail art cane slices using the “Viva La Nails” slicing knife.

Step 1 – Start by holding the cane tightly in your palm, facing in a vertical position.

Step 2 – The positioning of your hands should look approximately like in this picture. Make sure to rest you hands firmly upon your work surface or some other stable fixture.

Step 3 – Now, just begin to make a small incision in the nail art cane at the desired thickness. However, instead of continuing to slice through with the blade, hold the blade firmly in place and slowly rotate the cane with your fingers moving it forward into the blade to cut through your slice. Remember, it should be the cane and not the blade which is moving.

RESULT – Now take a look at the difference between these two pictures. The picture to the left shows a precut nail art piece, whereas the picture to the right shows a nail art cane slice cut manual. See how much thinner the manually cut slice is!

NOTE!!! When using this technique, you should ALWAYS use plaster tape in order to protect your fingers from getting cut by this industrial strength blade.

Chủ Nhật, 8 tháng 4, 2012

Halloween Nail Art Tutorial – Haunted Halloween Night!


Orange!!! This colour screams “Halloween” in an exuberantly creepy, crawly voice. For this reason, this is exactly the colour that we want to use in our Halloween designs. In this simple tutorial we'll use orange coloured nail art tips along with exclusive “Viva La Nails” nail art decals to create a dark and spooky Halloween design.

What you’ll need: water decals (HA08 and HA09), Konad set, white liner and top coat.
Technique: Water Decals and Konad
Skill Level: Beginner
Okay, let's get started!

Step 1 – First of all, make sure that you cut a few decals out ahead of time. This will save you the trouble of having to do this while your client is waiting. You want to make things as quick and painless for your clients as possible.

Step 2 – Prepare your decals in a few different sizes since each of your clients will have different sized nails. Our decals come in five different sizes in order to make this easy for you.

Step 3 – Now, place all of the decals you plan to use inside of a manicure bowl filled with water. Actually, any old bowl with do, but a manicure bowl just looks more dapper in the salon setting.

Step 4 – Remove your first water decal from the bowl and use your fingers to gently remove it from it's backing.

Step 5 – Now attach this water decal to your orange nail tip using a dotting tool or an orange stick. Now make sure that you get it into the correct position. You've got about thirty seconds before your decal dries out, so you should have sufficient time to make sure that it is situated correctly.

Step 6 – Repeat this process using a second “house” decal, and position it right next to the first. Use a smaller decal the second time to make the design look more natural. If some of the second decal hangs off of the surface, don't worry. Just wait until it dries and clip off the excess with your scissors.

Step 7 – Just so you don't think we're creating a friendly neighbourhood scene, now let's add a wicked little bat to our design. Use the same method to attach your bat decal to the nail surface.

Step 8 – Use your orange stick or dotting tool to make sure that the bat is in place!

Step 9 – Go ahead and add a second bat to the scene! If there is enough space, you could even add a third bat to the sky!

Step 10 – Okay, now that we've placed our decals successfully, let's move on to the Konad portion of the design. Apply a little bit of Konad polish to image plate number M3.

                                         
Step 11 – Scrape off the excess polish as usual with your special Konad scraper.

Step 12 – Now, using the Konad stamper, gently lift the image from the plate.

Step 13 – Take a quick look at the bottom of your stamper to make sure that the image has been copied perfectly.

Step 14 – Now let's finish our composition by transferring the star design from our stamper to the surface of the nail.


Step 15 – In this design, as in all, the devil is in the details! Take the thinnest brush that you can find and manually add some spooky white eyes to your bats to make the whole scene really come alive.

Step 16 – Using the same method, fill in the windows of the houses with white polish.


Step 17 – And, to finish it all off, add a healthy layer of Konad top coat to keep our design secure.
Congratulations – you made it!

Can you believe that you created such a vibrant design using just a few water decals and a bit of Konad magic? Plus, it looks great on short nails too!

                                       
Also, you can easily recreate this design on natural nails as well using a coating of orange nail polish as your background.

And don't be afraid to customize! I definitely recommend experimenting with rhinestones and glitter to add to this design. And of course, you can use other decals from our Halloween series to give your design an added twist.

Trick or Treat!

Halloween Nail Art Tutorial – Final Destination


Want something original and frightening to offer to your clients this Halloween? This design is sure to scare you down to the bottom of your toes.
Note that this design is only appropriate for use on gel or acrylic extensions as we will be using nail art cane slices.

What you’ll need: nail art canes, cutting blade
Technique: Ceramic Nail Art
Skill Level: Beginner
So without further ado, let’s get started!

Step 1 – First thing's first. Let's get organized. Preferably, this is something that you should do before your client even arrives so that the actual job can go as quickly and smoothly as possible. In this design, we'll be using three different sized black and white canes out of our “Sweets” series as well as special skull canes from our “Smilies” set.

Step 2 – We are going to prepare fifty pieces in total, most of them being rounds cut from the smallest sized sweets cane. Using your cutting blade cut a few of these slices in half so that you have a least two dozen half moon pieces as well.

Step 3 – These pre-cut half pieces are extremely important, as without them, you would have no way to fill in those tight extra spaces on the sides of the nails. Make sure that you keep your full rounds and half rounds separated for easy access.

Step 4 – These skull nail art canes are just a little bit bigger than we want for this design, so we'll need to trim them with a razor around the edges to leave just the skull in the centre.

Step 5 – Alright, now that we have our nail art cane pieces in order, we can begin preparing the nail tip for application. Start by applying a first layer of gel or acrylic depending on which method you are working with.

Step 6 – Using any sharp nail art tool, place the largest skull nail art can piece at the very centre of the spot where your design will be built.

Step 7 – Now take two to four smaller skull fragments and place them in a circle around the larger one.

Step 8 – Now all that you have to do is fill in the empty spaces between the skulls with round sweets nail art cane pieces. Place half moon pieces at the edges when necessary.


Step 9 – Once you have finished the design, continue building the nail as usual in a gel or acrylic technique.

Step 10 – Finish the design by sealing with a layer of top coat.
That’s it!
You've created an extremely effective look using just one, very easy to use nail art product. That was easy, wasn't it? You could also add a little colour to this design by using coloured canes as well. I think orange looks particularly good for Halloween.

Also, if you want to take this design beyond Halloween, you can create a beautiful and colourful design without using skulls at all. Simply replace the skulls and rounds with colourful rounds, fruits, or butterflies!

Have a great Halloween!