Hiển thị các bài đăng có nhãn Hand Nail Art. Hiển thị tất cả bài đăng
Thứ Hai, 9 tháng 4, 2012
Love These Nails
Nail artist Tina Alberino falls in "love" with nail stamps.
Shape the nail at an angle. Polish the nail pink. Use a brush saturated in acetone to remove polish from a semi-circular area at the corner near the eponychium. Fill in the semi-circle with sparkly silver polish.
Add a line of pink and silver glitter to separate the pink and the silver polishes. Either use a nail art stamp or an airbrush with a stencil to add the word “love” along the free edge (shown is a Bundle Monster stamp).
Apply top coat. Apply rhinestones.
Nails by Tina Alberino, Attitudes Total Body Image, Tampa, Fla.
Beautiful Bubbles
Christie Gibson provides both a printable step-by-step and a video for this gorgeous blue nail art design.
Apply UV gel-polish base coat. Cure. Apply two coats of teal gel-polish. Cure after each application. Leave the sticky layer on the nail. Use a natural bristle brush to press three different shades of glitter (light blue, silver, and dark blue) onto the nail. Press the glitter flat with your finger to create a smoother surface. Apply UV gel-polish top coat. Cure. Remove the sticky layer. Buff lightly.
Use a 20/0 liner brush and black acrylic craft paint to paint three horizontal wavy lines.
Paint varied circles in various spots on the lines to look like bubbles.
Use white acrylic craft paint to add accents to the lines and to give the circles dimension. Apply gel-polish top coat. Cure. Remove the sticky layer.
Nails by Christie Gibson, Christie’s Nails, Ocean View, Hawaii
Kiss Me, My Nails Are Irish
This festive St. Patrick's Day design was created by Jade Sewell.
Apply sparkly gold acrylic to the free edge, creating a French. Apply sparkly pink acrylic to the rest of the nail.
Use lime green acrylic craft paint and a fine point detail brush to paint a shamrock in the middle of the nail.
Use red acrylic craft paint and a fine point detail brush to add lips on the corner of the free edge.
Using white paint and a fine point detail brush, write “Kiss Me I’m Irish” on top of the design. Apply UV top coat. Cure.

Nails by Jade Sewell, Just Nails, Great Falls, Mont.
Why and How to Use Paper Nail Forms
Paper nail forms are one of the staples of the nail care industry, you simply can't do without them as a professional nail care technician. These disposable forms are the perfect base upon which to build a sculpted nail.
They are especially helpful when working on toenails which can be rather difficult to work with otherwise. You simply apply the paper nail form and use it as a guide upon which to do your overlay work. After the overlay is finished, you simply remove the paper form and you're done!
However, not all nail types are right for sculpted nails!
Therefore, before beginning to use paper nail forms, you will want to know when it is appropriate to use them and when it is better to use a tip overlay.
It is okay to use a paper nail form with a sculpting technique when:
If your client has a nail that is chipped or broken then a sculpting technique is appropriate. This problem is easy to fix using sculpting. Also, if your client has nails with a severe hook shape. This can sometimes be addressed using a sculpting technique as well.
Otherwise, you want to use this technique mainly on people with normal nails who are not engages in strenuous activities with their hands.
It is NOT okay to use a paper nail form with a sculpting technique when:
If you client has abnormally shaped nails, a sculpting technique is usually not the best options. For example, if he or she has flat nails, upward curving nails, or crooked nails, it may be better to use a nail tip technique. Also, if your client has bitten nails or nail plates that in poor condition, the sculpting technique is not a good option.
Here's how to do it!
While some of your clients will not be good candidates for the sculpting technique, chances are that most of them will fit into the first of these two categories, meaning being able to use paper nail forms is an important skill for your cannon. Here's how to use them:
Step 1 – Remove the centre piece from the nail form.
Step 2 – Now reattach this centre piece to the adhesive inner surface of the nail form. This keeps the form from sticking to the bottom side of the nail.
Step 3 – Bend the form over slightly in order to make it match the nail's curvature.
Step 4 – Now, tear the perforations at the top edge of the form as pictured above.
Step 5 – Next, fit the criss-cross edge of the form under the nail surface. Make sure to use two hands for this if you can.
Step 6 – Make sure that the nail form is snug and centred in place.
Step 7 – Now press together the inside edges of the form until they stick together.
Step 8 – Just to be sure, make a small cut at the corner and bend it back so that you know the form is securely in place.
Step 9 – Make sure once again that the curve of the form is straight and matches the curvature of the nail.
Step 10 – Now secure the entire form in place by folding down the loose edges over the finger.
Step 11 – That's it! You are now ready to begin work on your sculpted overlay.
French Nails with IBD Gel
The traditional French manicure is the most popular nail extension technique in the world. And believe me, there is a good reason for this. With a French manicure, you can create a look that is clean, chic & professional. Basic, but stunning.
French look is a combination between two essential elements: a pearly white free edge and a neutral coloured body. These are the bread and butter of this staple technique. Of course, even a French nails can be subject to variations. Some people like to replace the neutral body with a vibrant pink top coat. Remember, this technique may produce deceptively simple looking results, but it actually requires quite a bit of practice.
But there’s no better way to learn than to get started! Let’s go through the process of creating French Nails using an IBD gel system.
Step 1 – For a client with relatively long nails, nail tips won’t be necessary. So we’ll just begin by filing the nails to a standard uniform length.
Step 2 – Now, gentle push back the client’s cuticles with a cuticle tool.
Step 3 – At this point, it is important to smooth out the surface of the nails using a light filing. It’s best to use a 120/180 grit file for this purpose. Once you’ve finished this process, use a clean, dry nail wipe to remove excess filings.
Step 4 – Next, apply a bonder solution to the nail surface in sparing amounts. Cure the nails for one minute.
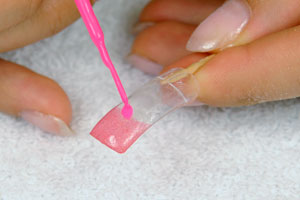
Step 5 – Place a layer of pink gel on the nails, making sure to cover the entire surface. This is not much different from applying regular nail polish. Cure for just a few seconds. If your client has nails will fewer imperfections, it may be appropriate to use clear gel instead of pink.
Step 6 – Now it’s time to treat the free edge (also known as the “tip”) of the nails. For this step, apply an ultra white builder gel in order to construct a smile line. Then, clean the brush and perfect the smile line by carefully moving the brush back and forth along the surface of the nail. You’ll need to cure for about three minutes before moving on.
Step 7 – At this time, you need to reinforce the stress area with another layer of builder gel. Dip the brush into your jar of gel and lift slowly. As you do so, a stringy fragment of gel should extend from the brush. Place this string of gel across the stress area and allow it to blend in on its own. This should be repeated until the desired shape is achieved.
You should work with just one or two nails at once. If you get gel on the surrounding skin, remove it using your cuticle tool. Cure for three minutes.
Step 8 – Use a foam wipe to remove any residue that remains behind after curing.
Step 9 – Ideally, the completed nail should be perfectly smooth. You can even these out using a nail file. I recommend the IBD Sapphire with 150 grit.
Step 10 – Finally, apply a very thin layer of seal solution. You should spread this solution evenly over the nail surface without touching the surrounding skin if possible. It helps to apply only sparingly at the area where the nail meets the cuticle. Cure for a final three minutes.
You can finish up by applying cuticle oil and massaging it into the cuticle area. That’s it! You’ve created a fabulous French Nails using IBD gel system!
Chủ Nhật, 8 tháng 4, 2012
Japanese Nail Art Festival Takes the Industry by Storm!
It is well known that Japan is a few steps ahead of the rest when it comes to nail art. But earlier this month, this was made clearer than ever at the Japanese Nail Art Festival in Osaka, Japan.
A total of 800 contestants and the same number of models gathered there to impress the world with their most innovative nail art designs.
This festival has become a tradition which has now been going on for fourteen consecutive years and displays no signs of slowing down.
The festival was dominated by the most advanced techniques in the industry, with artists pulling out all of the stops in order to create the most original and impressive designs possible.
At the same time as the contest, representatives from the top nail art technology companies made presentations demonstrating the newest advances in the industry. I wish I could have been there!
The most popular designs were three dimensional ones, especially gel patterned flowers. Surely, what is now popular in Japan is sure to be just as big in Europe and the UK before you know it.
For any of you who have been in nail art for long enough, you know that Tokyo is the Paris of nail art; it is the origin from which all new developments flow. What is big in Japan today, is going to be HUGE tomorrow in Europe, the U.K., the U.S. and everywhere else! This is why I like to keep an eye on all of the newest developments in Japan. This makes it so much easier to stay ahead of the curve. It's like being able to see into the future.
I also subscribe to many of the top Japanese nail art magazines. No, I can't read Japanese. But it doesn't really matter since the only really important thing to notice is the designs!
By the way, if you want to also keep yourself on the cutting edge, it's a good idea to pick up a few nail art magazines from Japan and other parts of Asia to have around your salon. You can even order these from “Viva La Nails” if you want. This will help give you new ideas and will also help your clients visualize what they want.
Fantasy Butterflies - Free Hand Nail Art
Today I'm going to teach you how to create a beautiful butterfly nail art design using a free hand nail art technique. This is a great design to use on clear tips, but it really works great over just about any colour. For clients who desire a brilliantly colourful look, this is the perfect design. And since this pattern can be used with just about any colour scheme, it's great for matching with outfits for special occasions.
The most important element of this design is the tiny butterfly pattern that you see above. Since this element is so crucial, it is a good idea to practise painting butterfly shapes alone on a blank nail surface a few times before attempting to complete the entire design.
What you’ll need: acrylic colour powder (pink), liners (blue, pink, black), top coat, dotting tool, rhinestones.
Technique: Free Hand Painting
Skill Level: Intermediate
And without any further ado, let's begin!
Step 1 – The first thing that we want to do is put down some sort of colourful background. This can be done using colour powder, coloured gel, or even glitter. You can either just colour the front part of the nail or you can do the entire nail surface. In any case however, it is a good idea to create some sort of contrast.
Step 2 – Next, use pink liner to draw a single oval in the shape of a flower petal over the prepared area of the nail.
Step 3 – Now repeat this process three more times to create a butterfly design.
Step 4 – Now, use a blue liner to create a second butterfly repeating the same movements.
Step 5 – To make your butterflies really stand out, you should now use an extra thin nail art brush in order to create a thin black lining around the butterflies.
Step 6 – Use the same thin brush to draw two small antennae on each butterfly.
Step 7 – To further brighten up your design, use a dotting tool to create several colourful dots in a random configuration throughout the nail surface. You should use an average of ten dots per nail.
Step 8 – Now, use top coat to seal your design.
Step 9 – You're not done yet! This design will look even better once we add some sparkle to it. Use a rhinestone picker to apply rhinestones or Swarovski crystals to the centre of your butterflies. Choose a colour that works well with your design.
Now remember, you don't have to painstakingly follow the colour scheme that I've demonstrated here. In fact, the results will be even better if you choose a colour scheme that is specially suited to your client's tastes. You can pick one or two great colours for the butterflies, or, if you want the design to really stand out, you can paint each butterfly a different colour!
Once you've mastered this technique, don't be afraid to experiment a little bit. I've found that butterflies look especially great on top of French nails. Why not? Even customers who usually eschew complex designs often have an affinity for this simple but striking pattern.
Đăng ký:
Bài đăng (Atom)


