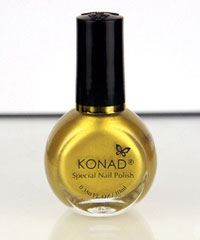
The 21st century has provided no dearth of new and innovative nail art techniques. One of the most effective and essential of these is the Konad nail art stamping system. Konad is a product which allows you to create complex nail art designs in less than a quarter of the time.
Konad's secret is its use of a pre-designed template model. The centrepiece of the Konad system is a special engraved image plate containing a number of “preset” patterns. This allows even a novice nail artist the opportunity to supply clients with consistently professional looking designs.
Now before we go on, allow me to warn you about something: There are dozens of companies now on the market who make tons of money marketing FAKE Konad products. I know from personal experience that these products are inferior in quality and simply cannot produce the same kind of results. For this reason, “Viva La Nails” carries only AUTHENTIC Konad products.
The great thing about Konad is that it produces very sophisticated looking results without requiring a sophisticated process. In fact, Konad is actually quite easy to use. And seeing that it requires only a few simple tools, it is portable as well. This makes it a great choice even if you are operating a mobile nail care business.
All right, enough with the small talk! Let's get down the process itself:
Step 1 – The first step is to use a fresh cotton piece and some acetone to carefully clean the image plate. This is a quick and worthwhile step which will increase the overall performance of your Konad system.
Step 2 – Assuming that you are starting out with a brand new Konad system, it is best to treat your stamper tool with a 100 grit nail file. Otherwise your stamper may be a little too smooth for optimum functionality. File it down lightly just as you would a nail surface.
Step 3 – Now use the same cotton piece with acetone to clean off the stamper surface.
Step 4 – At this point, paint a small portion of Konad Special Nail Polish onto the preferred image on the image plate. Make sure that you use only official Konad nail polish for this step. Regular polish or Knock-off polish simply won't produce acceptable results. This layer of polish doesn't need to be too thick, just thick enough to cover the design.
Step 5 – Quickly after you have applied the Konad polish, use your Konad scraper to make a quick scrape across the image plate. Move away from the centre of the plate towards the side, removing any excess polish. The pressure that this creates on the image plate may produce scratches on its surface. If this happens, don't worry. This is completely normal and will not have any negative effects on the system's future performance.
Step 6 – Keep moving quickly so that the polish does not dry. Pick up the stamper and press it very lightly onto the design on the image plate. This should be done by placing one edge of the stamper down first and then quickly rotating it down on the image plate and then right off again. No pressure is needed, just a single clean movement. After a little bit of practise, this will be just like tying your shoe.
Step 7 – Before transferring the design to the nail surface, check to make sure that it looks perfect on the stamper. It should look clean, without and broken lines, just like in the photograph shown here. If it is not, wipe it off with a cotton piece and some acetone and try again back at step number 3.
Step 8 – Now, transfer the design from the stamper onto the nail. You should again use the same type of movement that you used to get the design from the plate onto the stamper. Don't apply too much pressure; simply move the stamper from one side to the other in an easy rolling motion.
Step 9 – Once you have transferred all of the desired designs from the plate onto the nail surface, allow it to dry for a few minutes. Finally, use some Konad Top Coat solution to seal your design.
Just to make sure that this final tricky step comes off well, make sure to follow these two rules:
1. Use only REAL Konad top coat solutions.
2. Apply this top coat only ONCE. If you try to apply several strokes of top coat, you are likely to damage your design.
IMPORTANT!!! After each transfer, make sure to clean the stamper, scraper and image place off with a cotton piece and acetone. This is essential if you want to protect the quality of your designs.
And you're done! You've created a premium professional looking design in just minutes. While this technique may take a little practice, this is really very little compared to more demanding techniques. You should be working like a pro in just a couple of days.